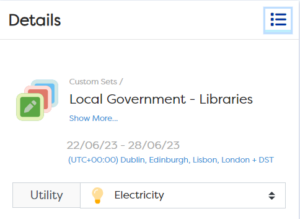
Custom sets give you the ability to add and amend your own sets of sites and meters to your tree, which you can then run reports with. The reports available when a custom set is selected relate to the types of meters included in the custom set.
Custom sets can provide insight when comparing sites across a portfolio, and examples of possible uses for custom sets include the following:
- Comparing buildings with expected similar energy consumption (for example by function, population or operational hours) to help identify poor performing sites
- Reviewing sites by region, building type or function
- Analysing sites managed or monitored by a particular individual
- Comparing sites where an energy saving project, initiative or technology have been rolled out
Creating a custom set
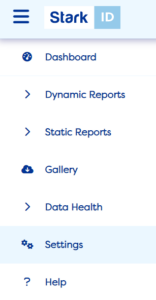
Go to Settings using the left-hand navigation pane.
Select the Custom Sets tab at the top of the page. This will then open the custom set editor.
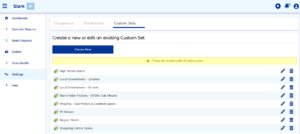
To create a new set, click the Create New button.
This will then open a new window allowing you to name your set in the text box at the top of the page.
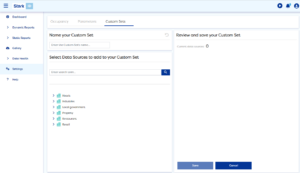
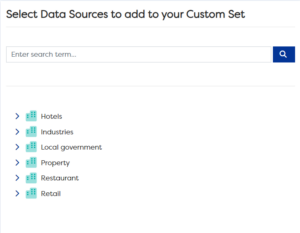
Next, you need to Select Data Sources to add to your Custom Set using the tile titled as such. From here you can expand the tree and select the relevant items that you wish to add to your Custom Set by checking the tick box next to each site or meter.
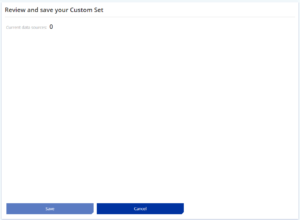
When selected, a meter or site name will then also appear in the Review tile.
You will be able to see the number of sites or meters currently included in your set above the listed selected sites.
Should you wish to remove an item from your set during this process, then you can simply untick the site or meters that you wish to remove in the site tree window or click the x icon in the Review tile.
To undo a change made to your set, you can simply click the Undo button in the Name your Custom Set tile.

Once you are happy with your set, or want to save your progress click the Save button at the bottom of the Review tile.
This custom set will now appear alongside your others, displayed beneath your site tree for reporting purposes.
Editing an existing Custom Set
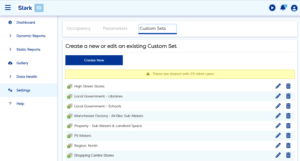
Go to Settings using the left-hand navigation pane.
Select the Custom Sets tab at the top of the page.
This will then open the custom set editor.
Your existing Custom Sets are listed below the Create New button. To edit a set, use the pencil icon.
From here you can select additional sites and meters to add them, or unselect items from the tree to remove them from your set.
You can also amend the set name by simply overwriting the existing name.
To save your changes click the Save button at the bottom of the Review tile.
Deleting a custom set
Open the custom set editor and alongside your set names, you will see a delete button.
Press this and a message will appear asking you to confirm whether you want to permanently remove this set. If you press yes, the set will be deleted. If you press no, this message will be closed.